How to Make a Grid Collage
The collage technique is extremely popular today as it allows everyone to create unique compositions in any style. Today we'll share some tricks and secrets for making a grid collage. As simple as it may seem, this technique offers great scope for designing one of a kind masterpieces.
Prepare the canvas
Launch Photo Collage Maker app. In the startup wizard, select Blank Project, and set the page dimensions: width, height, and resolution. You can choose from preset paper sizes, or enter the page dimensions manually in inches, millimeters, or pixels.
Start Grid Collage wizard
Click Add in the main menu, and select Grid Collage. This will start the Grid Collage wizard. First of all, the wizard offers you to choose the basic collage layout. Here you decide if you wish square or rectangle cells, if there will be a central picture, and how other pictures will be arranged around it.
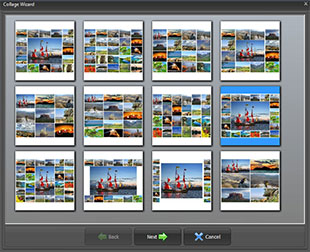
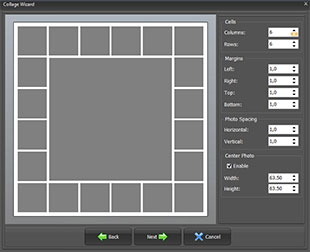
Pick one of the layouts and click Next. Now you can set the number of rows and columns, the margins and the spaces between the cells. When you’ve done that, move on to the next step where the wizard prompts you to add photos.
Add your photos
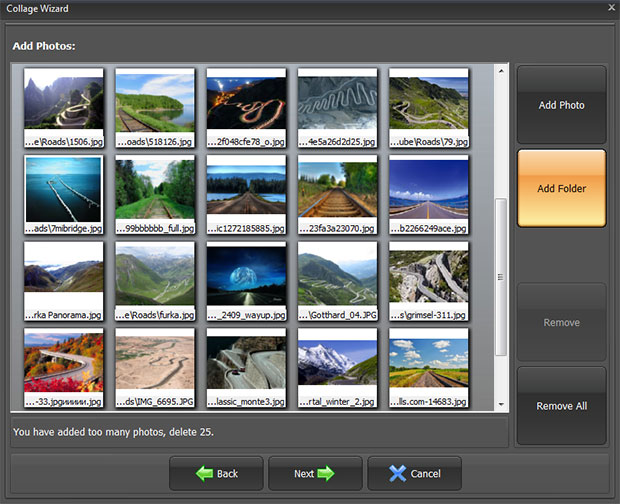
The best thing to do is click Add folder – this way you can add a whole bunch of photos at the same time and then just remove the ones you don’t need. The wizard will prompt you when there are enough or too many photos to make a grid collage with the chosen design.
If you want to get a professional result, it’s a good idea to pick all the photos in advance, keeping in mind the shape of cells you’re going to use. When you make a grid collage, it is vital that all photos are the same orientation (either portrait or landscape) and about the same proportions, otherwise you may need to crop them.
Customize the layout
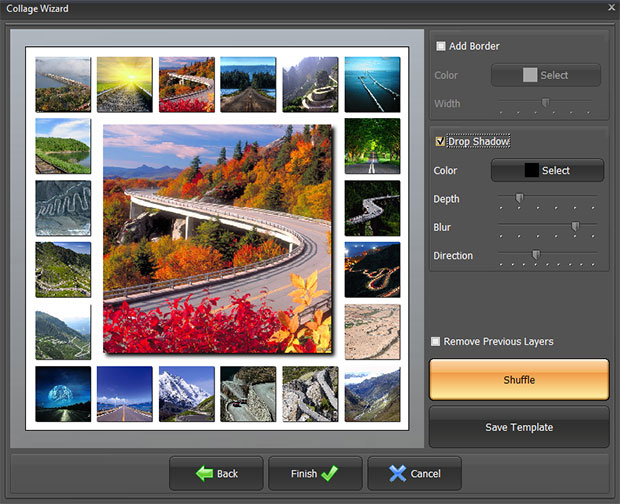
We are now at the final step of the wizard. Here you can add a border or a shadow to each photo. You can choose any color for borders or shadow and adjust their settings. Besides, you can click Shuffle to arrange the photos in another way. When you’re done, click Finish. This will take you to the main working area where you get access to a lot of other customization tools.
In the main working space you can switch between the tabs on the right. The Photos tab is open by default. You can replace any photo in the grid – just pick a photo on the right and drag it to the canvas on top of the one you don’t like. Switch to Background tab to change the collage background – it can be solid, gradient, textured, or image. Open Frames and Effects if you want to add picture frames, masks, or edit photos with filters.
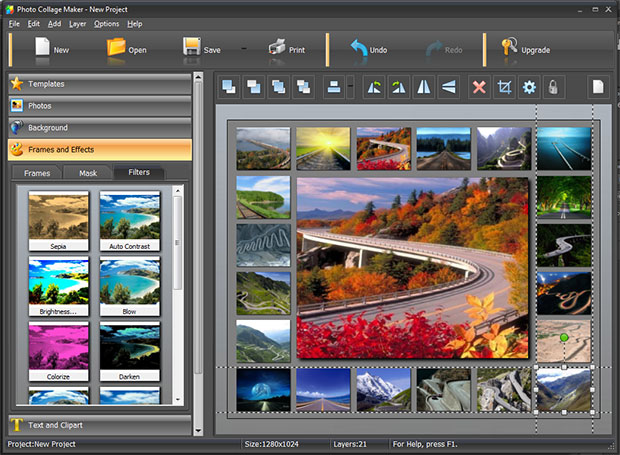
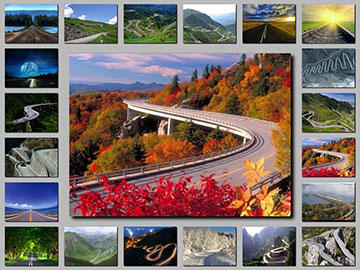
Slight changes can lead to creating a unique design. For example, remove a couple of the photos to make textured background visible, resize some photos so they occupy more than one cell, etc.
If you're looking for inspiration, check out this Facebook album with various grid collage samples. Download Photo Collage Maker and try making a grid collage of your own!
with Windows 10, 8, 8.1, 7, Vista, XP
Testimonials
I tried many collage creators before I found yours. After using the trial for some time I realized it was exactly what I needed. I like its intuitive interface and templates that make my collages look professional. Thanks a lot!
For my sister's birthday I needed a beautiful collage from her childhood photos. I downloaded your program and all I can say is WOW!! I had a cool collage in a few clicks! Just another thank you, all other photo editors I have purchased from you work as good as your collage software. You rock!
Downloaded your program this evening and quite happy with it. Nice, high resolution collages, clipart and frames and, most importantly, it's a pleasure to work with - everything is so well thought-out and handy.
Generate collages in minutes with just a few mouse clicks.
Try Photo Collage Maker now!