How to Blend Pictures Together
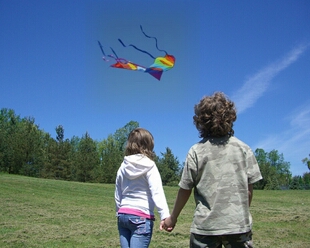
Designing a photo collage, a framed picture, a greeting card or a scrapbook page, you sometimes wish to merge some parts of the composition so that they appear as if they are a whole. When you blend pictures together, you add an exquisite flair to the images, amaze the spectators and challenge their imagination. The blending technique can be used both for creating thoughtfully designed masterpieces and for enhancing a picture that is way too simple on its own. Regardless of your aim, you will certainly enjoy learning it.
How can you blend pictures together? A while ago you would need to install expensive professional software, and master sophisticated photo processing tools and techniques such as manipulating image layers – in a word, it would take a lot of time and effort. Today there is an easier way thanks to the development of user-friendly photo editing programs. For instance, you can make use of photo collage software tools. Using the integrated Mask tool you will blend pictures together with a couple of mouse clicks, and get a professional-looking result.
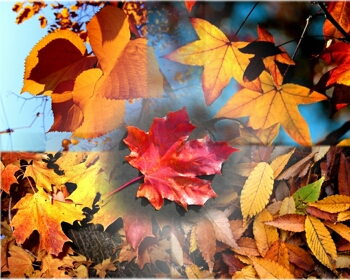
Picture masks come in different shapes and sizes. These enable you to make compositions of different kinds, e.g. blend a portrait photograph with the background, merge two or several landscape photographs, and more. They also help you enhance and customize ready-made scrapbooking templates – see some examples in How to Edit Pictures with Masks. In Photo Collage Maker you will find dozens of Round, Rectangular, Fancy, Themed, Gradient masks.
Follow this step-by-step guide that shows how to blend pictures together in Photo Collage Maker.
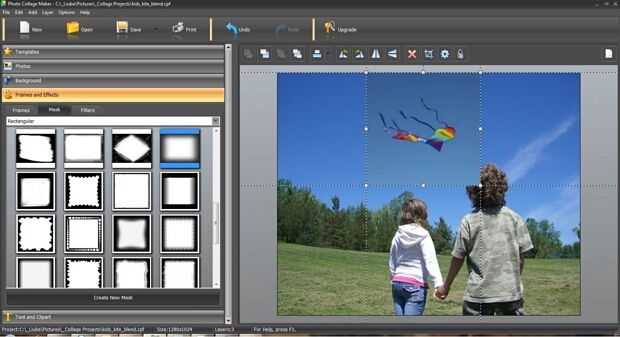
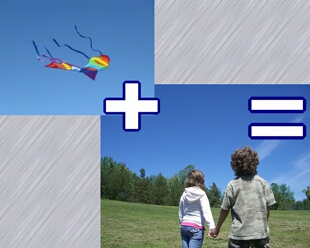
1. Create a new project. Place the pictures you would like to merge on the canvas. Depending on your idea, you can either put them side-by-side, or place a smaller picture on top of a larger one.
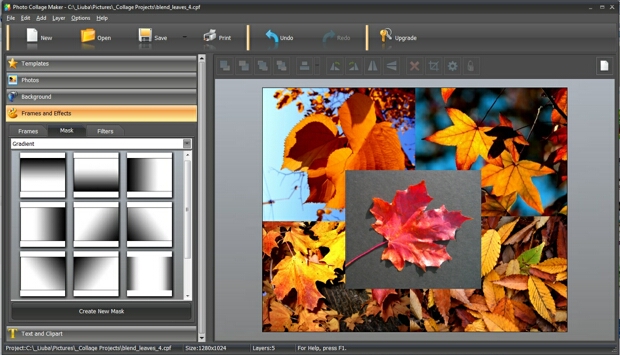
2. Open Frames and Effects in the left working pane and select the Masks tab. Browse different masks categories. For blending a smaller photo with the background, choose a round, rectangular or fancy mask with blurred edges. Gradient masks are ideal for merging pictures of the same size.
3. To apply a mask, drag and drop it on the image, or select the picture and double-click on the mask.
4. For a perfect blend, stretch the edges of the images located side-by-side – just capture the edge with the left mouse button and drag it to cover the adjacent picture. This way you will merge their sides and maybe discover unexpected effects.
5. If you are blending a smaller picture into the background, you can drop a colored shadow for the best result. To add a shadow, right-click on the picture and select Settings. You will see three tabs: Main, Decoration and Effects. In the Effects tab, check the box for dropping a shadow. Choose the shadow color matching your background, adjust its blur and direction, and the border between the masked image and the background will disappear completely.
As you see, it’s incredibly easy to blend pictures together – and it’s fun, too! Try it yourself with Photo Collage Maker!
with Windows 10, 8, 8.1, 7, Vista, XP
Testimonials
I tried many collage creators before I found yours. After using the trial for some time I realized it was exactly what I needed. I like its intuitive interface and templates that make my collages look professional. Thanks a lot!
For my sister's birthday I needed a beautiful collage from her childhood photos. I downloaded your program and all I can say is WOW!! I had a cool collage in a few clicks! Just another thank you, all other photo editors I have purchased from you work as good as your collage software. You rock!
Downloaded your program this evening and quite happy with it. Nice, high resolution collages, clipart and frames and, most importantly, it's a pleasure to work with - everything is so well thought-out and handy.
Generate collages in minutes with just a few mouse clicks.
Try Photo Collage Maker now!